
This article shows a step by step process of restoring your G503 WWII Jeep Radiator - By Lew Ladwig


|
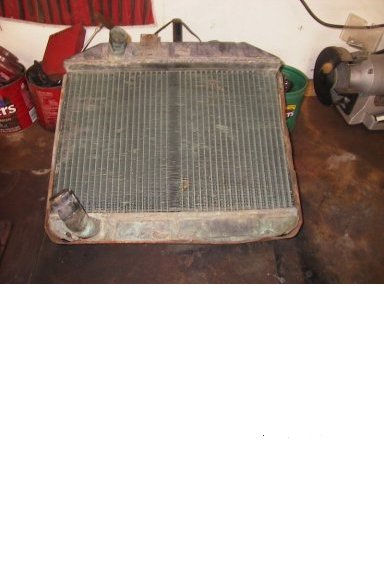
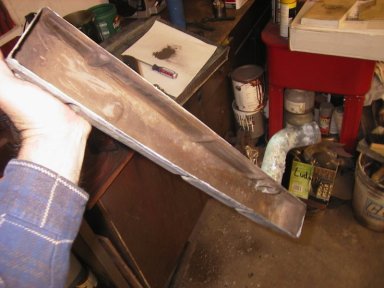
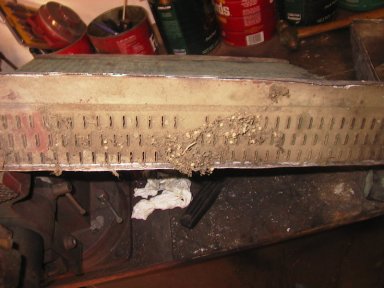
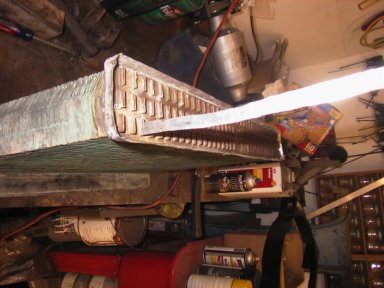
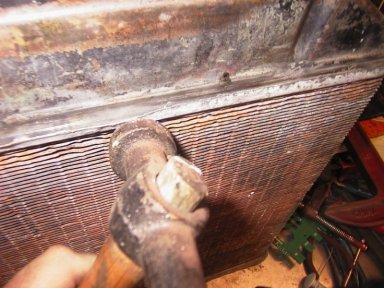
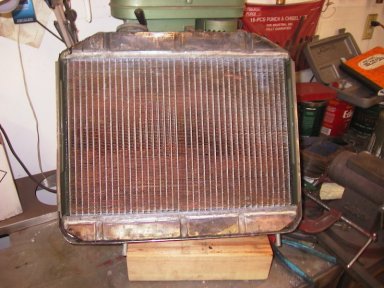
1. I found a good GPW radiator. Most of the thin fins are bent over but the tubes look to be OK. It has the correct 45 cut on the sides and the center missing tube. The tanks have several dents and the bottom tank is bulged out. This is probably due to freezing. My plan is: -Measure -remove frame -remove tanks -clean and rod -pound out tank dents etc. -straighten fins -remove tarnish -resolder -add shroud -add over flow tube -paint -zinc plate carrige bolts |
|
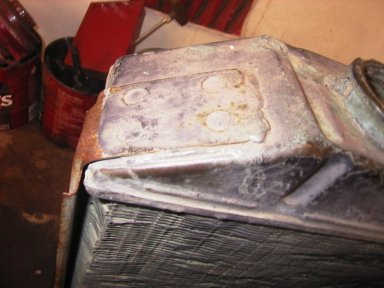
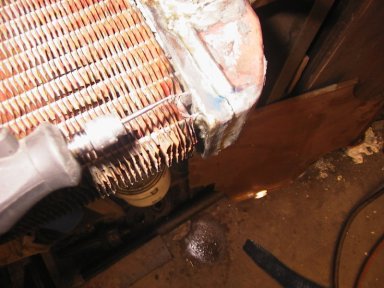
2. You can see where the frame is soldered to the top tank, there is also solder along the bottom and the lower corner tabs. Mine had broken the solder joint at the corners and most of the bottom. |
|
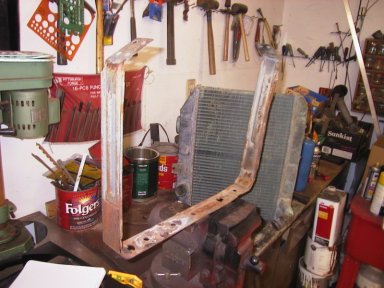
3. Here is the frame removed. Now I can sand blast it and bend it back straight. Many of these are rotted by the battery and could be repaired at this time. |
|
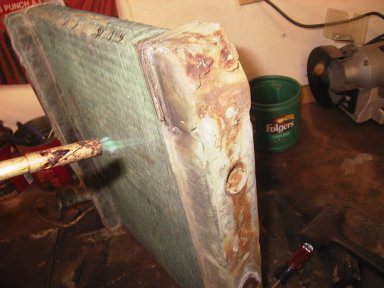
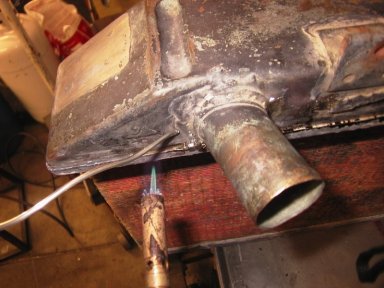
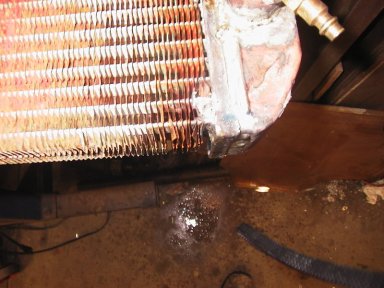
4. Here I am sweating the solder from the lower tank seam. Let gravity do much of the work. As you heat things up the two parts tend to seperate with the heat. Be patient. I used a putty knife to scrape hot solder out of the joint. Worked for about 20min but did not have it apart yet. Another 10min should do it. The last radiator I did this on it came apart in about 20min or so. Just look for areas that are still soldered. Heat them up and work as much solder out of the joint as you can and wiggle the joint as it cools so it does not rejoin. |
|
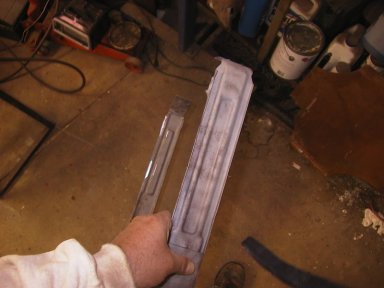
5. Here is the lower tank which came off with about 5min more work: |
|
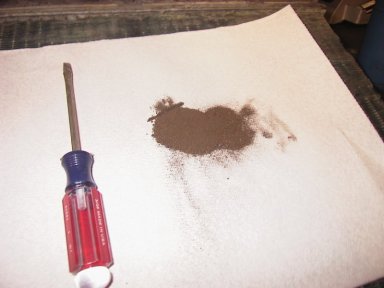
6. This is about 1/3 of the dirt from the bottom tank: |

|
7. I'll clean the solder from the tube joint as it was cracked. When I get ready to redo the joint all surfaces must be shinny clean to bare metal. |

|
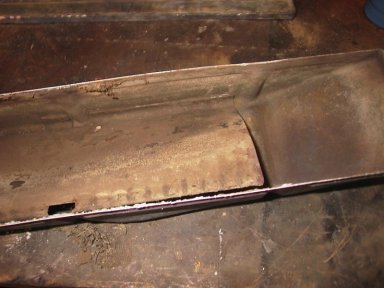
8. I have one spot that has a folded dent. I don't think I can pound it smooth but will try to reshape the area. I use body tools for this work. I removed several other small dents. The bottom was bulged out due to freezing so I pounded that back and reshaped the sides using a 2" square tubing as an anvil. Came out well. |
|
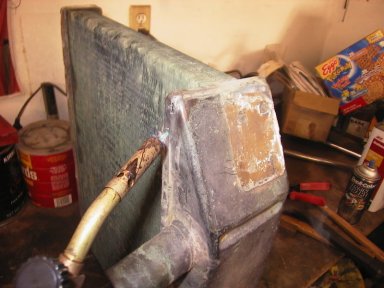
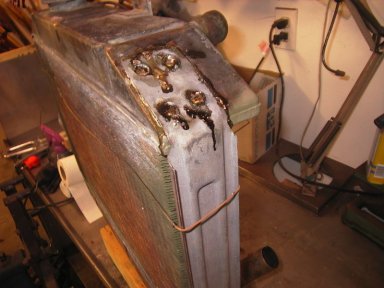
9. Worked on removing the top tank. It took about 15 min with the help of my oldest son. As you heat the seems the solder bubbles out. Set up so it runs out of the seam. |
|
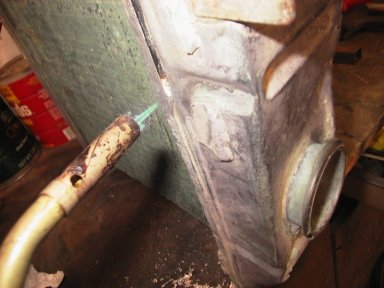
10. Work your way down and be sure you get it all out. Use a putty knife or screw driver to seperate the parts: |
|
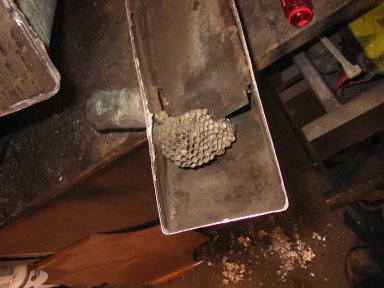
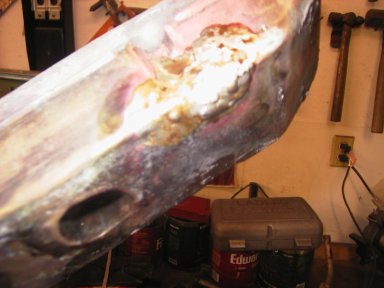
11. With the top off, look what we found, a wasp nest! Do you think a can of prestone flush would have removed that? |
|
12. Lots of dirt and junk in the top: |
|
13. Baffle was loose in most parts: |
|
14. Baffle is removed. I tried the muratic acid again as today was a warm one and the acid was much warmer. It does work but I need a better container so I can fit the big parts in. |
|
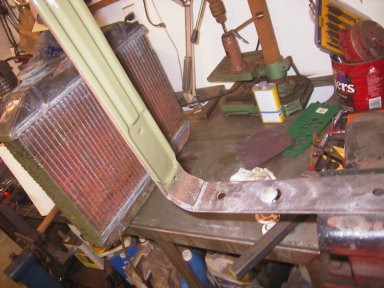
15. Here is the edge of the frame where acid rot from the battery and rubbing on something ruined the edge. About 1/8" to 1/16" was missing or very thin. The steel is too thin to mig weld so I O/A welded it. |
|
16. Then ground it smooth, look like new: |
|
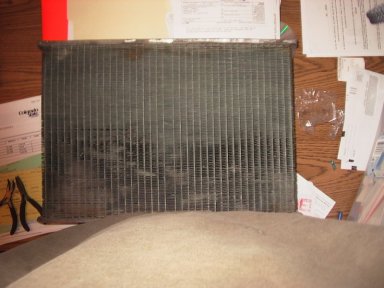
17. Next, after washing the core, I started to straighten the fins and tubes. I used a small pair of thin flat bladed pliars. You can see in the picture my first pass over the upper half of the fins. Still need to do the lower, ends, and other side: I think I wil give it all a muratic flush when I'm done. Then a bit of a rinse in baking soda water to neutralize the acid, and a good soapy water rinse. |
|
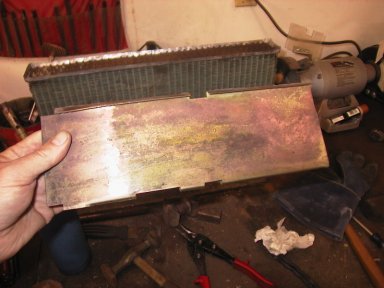
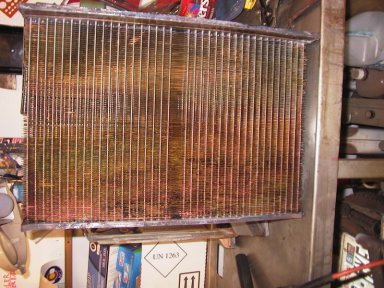
18. I was able to set up an acid bath. I used muratic acid from Lowes. Since things were warmer it was very effective. I flushed the core several times, gave it a water rinse, and a flush with my lye mix. Lots of dirt, paint, and copper oxides came off. Much of it was now bright copper. I continued to flush and clean inside and out. I used some triox to make sure all was clean: It was nice to see daylight between the fins and thru the tubes! It really cleaned up |
|
19. I rodded it out using a thin strip of aluminum. This works great. There is a slight crimp on the top of each tube in the center of the flat side. A couple of these needed to be opened to get my rod in there. After this I rinsed and shot each tube with a blast of air. They are good and clean. I inspected each tube with a light to be sure they were open and clean. |

|
20. Next I fixed a very tiny crack by cleaning and soldering on the inside and out side. I did not back this one up as it was very small and I don't think it was cause by a load but rather when the bottom froze some. |
|
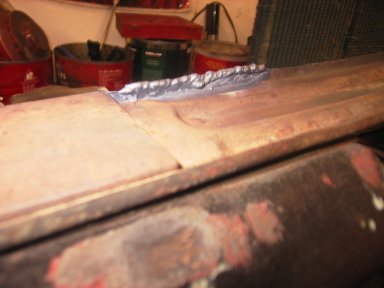
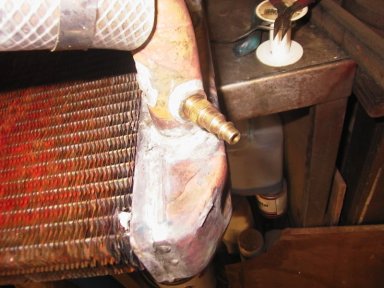
21. Next I needed to fix a real bad spot. This is where the brass was folded on it's self. I had one small spot where the brass was then layered and there was no way to fix it. So I pounded it all smooth and put a layer of solder over it all: |
|
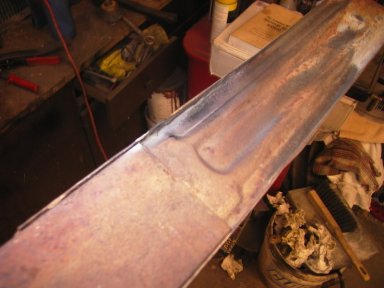
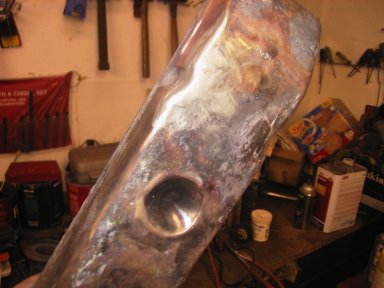
22. Since the area was where the "groove" in the side on the tank was, I had to shape things back to look right. I think it came out fine. next step will be to fit the tanks nice and tight and polish the brass bright before I solder it back up. Since the brass is soft, I can touch up the shape real easy. A good tight fit is improtant just like doing plumbing. Once it fits just right I'll tin it with a my tinning flux and then solder it all back up |
|
23. I polished all mating surfaces to bright metal. Checked the fit of each piece. I started with the baffle. It goes in one way. Check the width of the tank at the seam area as the baffle will control that some. |
|
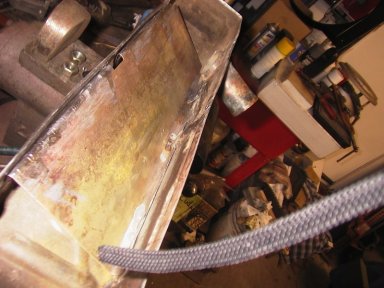
24. Then I worked on fitting the top tank to the core. I made sure is sits full depth. You may have to remove some solder from the top of the core to get the tank to sit correctly. Once in place I started tapping the core lip tight to the tank. Be careful not to push the tank sides inward when doing this. OH, I forgot, put tinning flux along the entire seam. |
|
25. Then I soldered the seam closed. If you did a good job on the prep work the heat will suck solder into the seam. Be carefull that you don't over do the solder as it will flow into the tank and build up inside. I like to move along steady and get it to flow and once flowing move on. I double back and fill the top edge to be sure but only to the point it starts to flow. |
|
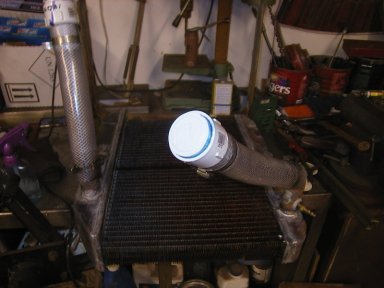
26. I set up my pressure testing method. I installed a hose over each pipe with a cap on the ends. I then put a standard air chuck fitting in the petcock hole. Installed a cap on the fill port. Hooked it up to my air compressor and charged it up until the air started leaking out he pressure cap. This was about 7 lbs.. I then checked for leaks with soapy water. I could have used a tub with water but did not want to do that just yet. |
|
27. I could have used a tub with water but did not want to do that just yet. |
|
28. I cleanded the area with my dremil tool. |
|
29. Then soldered it up. I could not get the lower fin back in place. I suppose if I worked on it some more I could but I would rather be sure it does not leak. |
|
30. Here you see the frame is blasted |
|
31. Don't forget the mounting bolts! Mine are a tight fit in the half moon so I put them in ahead of time. |
|
32. Start at one end and work around. Edge is 1/4" in from the front. |
|
33. Use the access holes on the bottom to get good bonding. |
|
34. ...and the frame is done! |
|
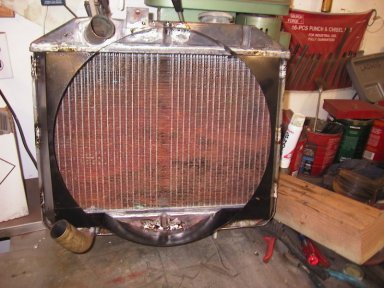
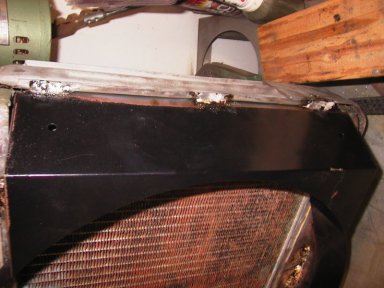
35. Shroud fitted and soldered as per original spots: |
|
36. Spots down side...I don't know if you noticed but I prepainted the inside of the frame where there would not be any soldering. I also got the fins painted down the sides. Probably not factory but with this area being near the battery I wanted some protection. |

|
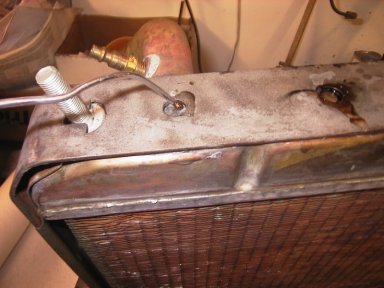
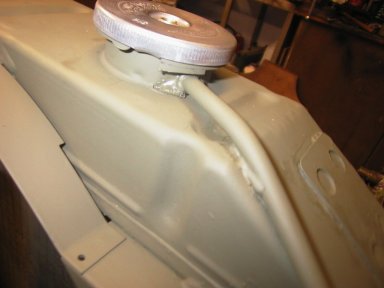
37. Here I installed the overflow tube. I flared the end to fit over the nipple on the neck. |
|
38. It gets soldered at the neck and on top and a few down the side. |
|
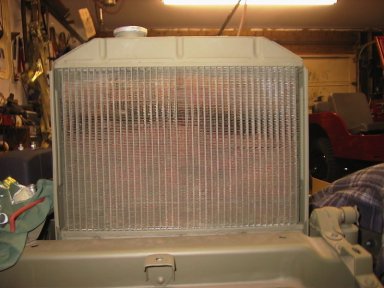
39. I think it came out well. I gave the whole unit a coat of OD after wiping it all down with acitone to get flux off. |
