
This Article describes how to replace a G503 WWII Jeep Engine Rear Main Seal. You shouldn't have to remove the engine but you may have to. Applies to 1942,42,1943,43,1944,44,1945 Jeeps models


|
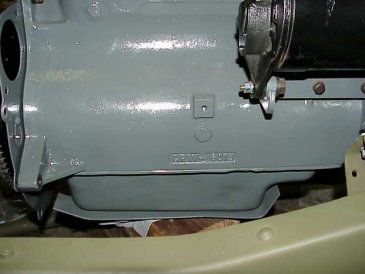
1. Whether you have many miles on your engine or a fresh rebuild, you may be faced with replacing your rear main seal do to leaking. You will notice excessive oil leaking around the front of the bell housing. Don't be confused by thick gear oil from your transmission. This can be done without pulling the engine if you can get to the seals. If you try and you can't get the seals out, you will need to pull the engine out (a few inches) in order to be able to slightly drop the crank for space. |
|
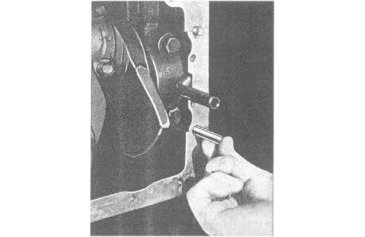
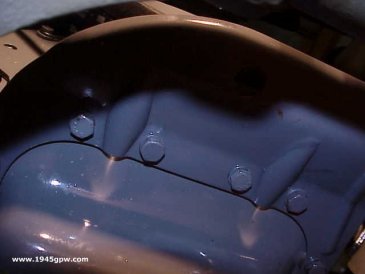
2. Here, the oil pan is removed, follow the crank shaft towards the transmission bellhousing. You want to remove the main cap. Two bolts holding the drive shaft in position |

|
3. When the bolts have been removed, slide the main cap out and inspect. There should be two rubber wick type packing on each side. Remove these. Inspect the cap and the main seal that should fall with it |

|
4. Here is the trick if you can do it. The issue with the crank in place is it holds the top half of the rear main in place. Try and pull it out with needle nose pliers, or screw in a metal screw and try pulling it out. |
|
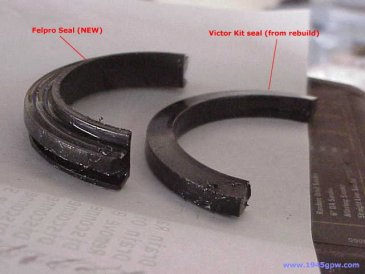
5. Assuming you were able to pull out the top half of the rear main seal (note one trick is to use a machine screw into the top seal and pull it out with needle nose pliers), you want to replace it with a new one. There are a couple types. The TM's show the rope type seal that come in gasket sets. Here, we installed a Felpro seal. |
|
6. Oil your seal down and slide it into position on the top half. If that goes well, you don't have to pull the engine and drop the crank. If it doesn't then you will need to drop the crank out of the pan a bit. (Pete Silfven tip) If the top half is difficult to install, rotating the crank while installing it will help get it in. |
|
7. As part of the rear main seal gasket kit, you will have rubber seals to replace in the block. You want to pull the old ones out, and replace with the new ones. |

|
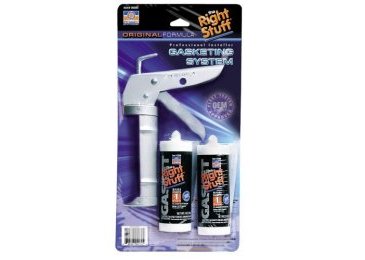
8. Before installing the main cap back in, we apply a little Right Stuff gasket sealer. |
|
9. Here is the prefered gasket sealer used. Called the Right Stuff. |

|
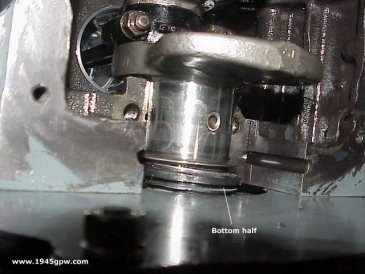
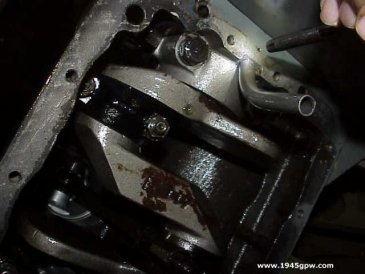
10. Put the bottom half of the seal in the cap and slide the main cap back into position and tighten down. You should see a little excess gasket sealer come out if you applied any. If so, wipe it down. |
|
11. Prior to placing the oil pan back on, clean off the old gasket and sealer on the block with a putty knife. Using solvent, make sure the hole area for the oil pan is clean and clear of debris. |
|
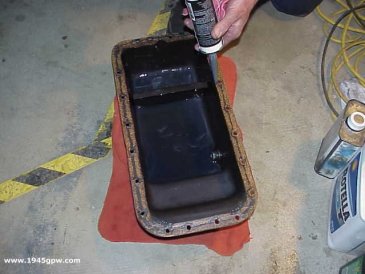
12. Clean off the oil pan of the old gasket, and replace with a new gasket. Apply a little gasket sealer on the side that will be applied to the block. Then install. |
|
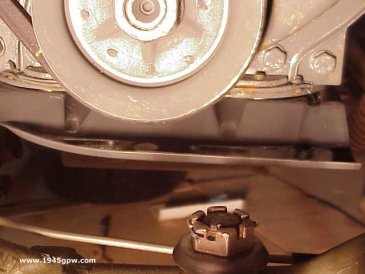
13. Don't forget to install your engine pully plate as well in this process. |
|
14. Pan and pulley are on, wait a bit for sealer to harden up. Install your oil back into the engine, check for leaks on the pan. If all looks good, start the engine up and see if the rear main seal leaks anymore. |
