
Eventually everyone has a head gasket go bad. It can be Oil in Coolant, Coolant in Water, or white smoke out the back. We show you how to replace your cylinder head gasket here.


|
1. There are a number of symptoms that describe a potential head gasket problem. Oil in your radiator coolant, bubbles in your radiator (while running), Coolant in your oil (milky color), or white smoke our your exhaust. |
|
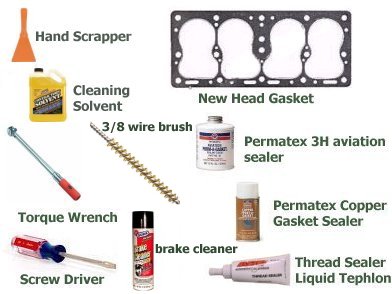
2. This jeep had some white smoke coming out the exhaust (periodically), and when running with the radiator cap off, you could see bubbles coming up in the radiator. Here are the items you will need for a head gasket replacement. |
|
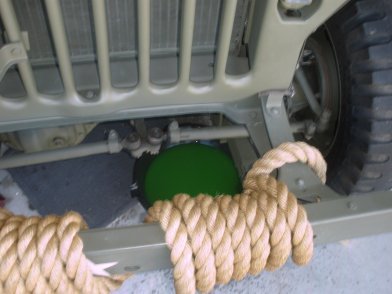
3. First we need to start emptying fluids and dismantling parts. To start, open the radiator cap, and drain the coolant from your system. You don't have to drain all of the coolant, but at least 50%. |

|
4. Just a note. When projects like this require removing parts, I like to fix and paint along the way. We will be changing some things along the path of this project. |
|
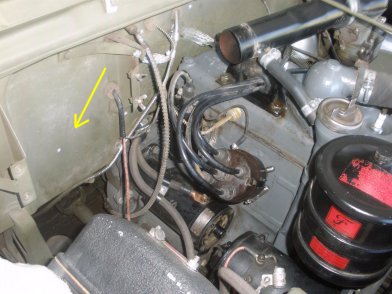
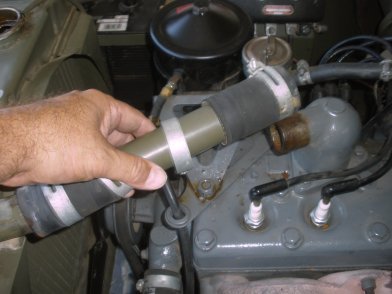
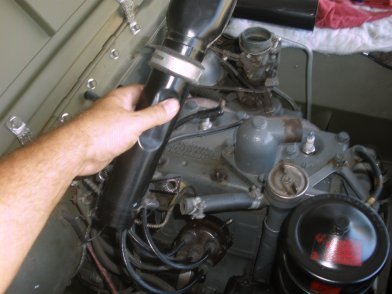
5. Next, remove the air filter unit from the firewall. This will give you some extra room to work. |
|
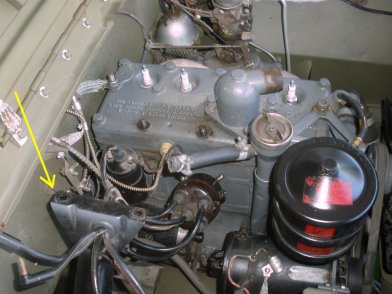
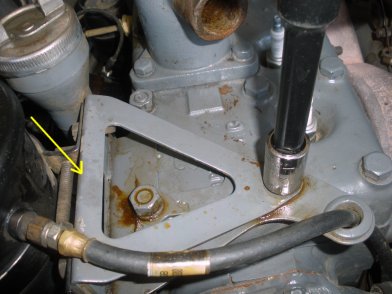
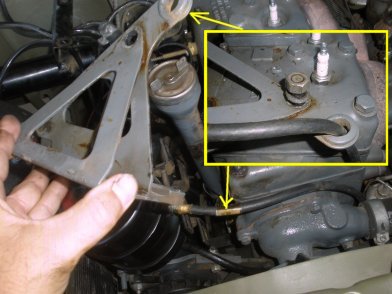
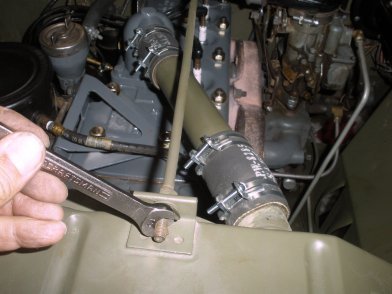
6. Remove the Radiator stabilizer from the tub to the radiator. |
|
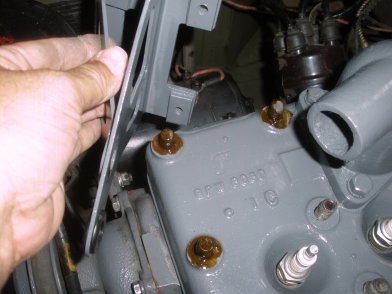
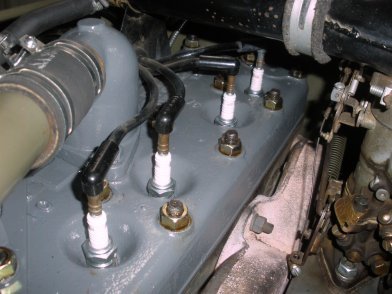
7. Next, add a little penetrating oil to the studs on your cylinder head. At minimum you will have 5 (earlier engines), later engines will be all studs |
|
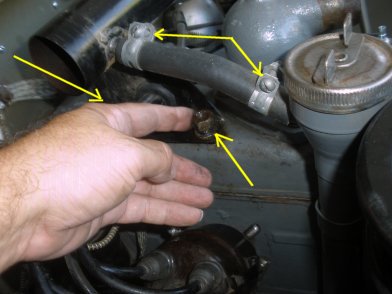
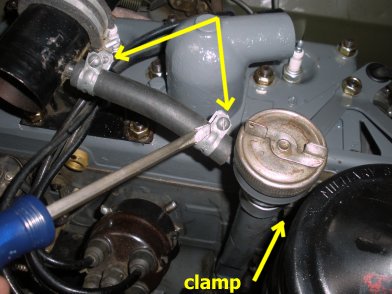
8. Next, remove the top radiator hose or tube. In this example, the metal tube requires four clamps to be loosened. |
|
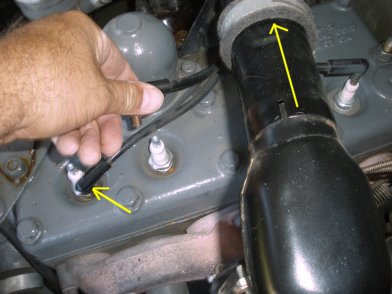
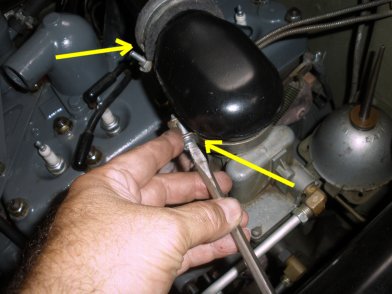
9. Remove the spark plug cables, and loosen the air horn grommet and slide out of the way (if you want to touch up the air horn). Otherwise, your can flip thr air tube over later. |
|
10. Remove the Air Tube Oil breather tube clamps and unscrew the two nuts from the cylinder head. |
|
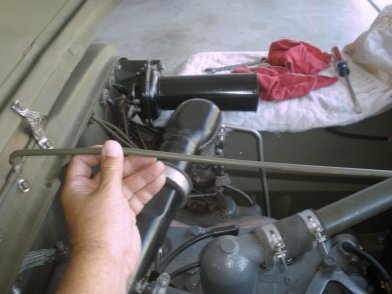
11. Flip the air tube over and let it hang where the Air Filter container used to be. (if you need to paint these items, its a good time!) |
|
12. Here you see the air tube is tucked out of the way from the engine head. |
|
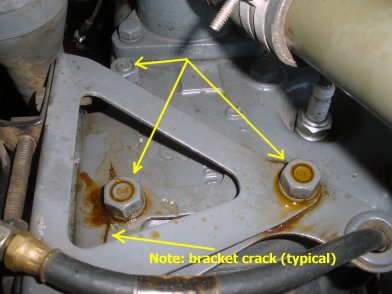
13. Now we want to remove the Oil Filter bracket. In this case, we are goint to remove the bracket from the canister because we fixed the crack in the bracket (Click this article). Otherwise, you can remove the bracket and set it on top of the generator. |
|
14. *optional* Here the Oil Filter bracket was removed from the Oil Filter Canister. Note: you need to remove the top oil hose from the canister as it passes through the bracket. The oil filter canister is just resting on the generator. |
|
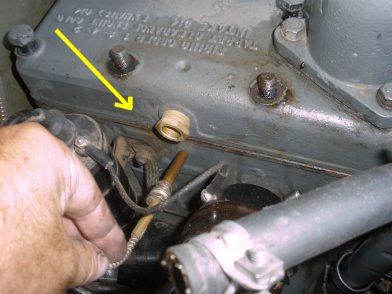
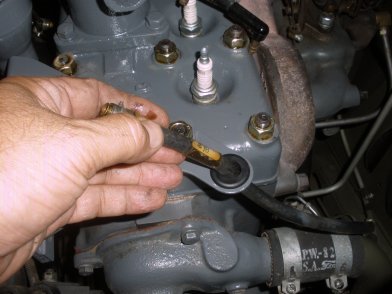
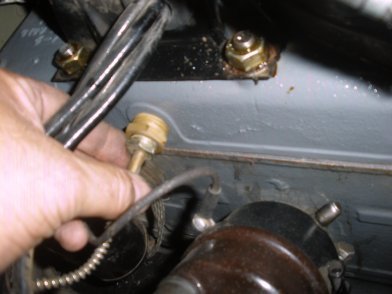
15. Next, remove the temperature gauge element from the cylinder head. |
|
16. At this point, all the components are disconnected from the cylinder head. NOTE: you might encounter a stud that comes up rather than a nut loosening. No problem with this, and we will clean this up later in the process. |
|
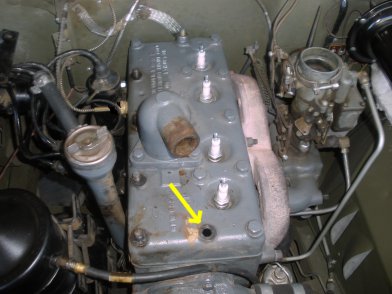
17. Now remove the rest of the bolts/studs. In this case, they were bolts (we will replace with studs later) |

|
18. The cylinder head can not be pulled off the block. The cylinder head is very heavy so you may want some help the grab on both sides. Be very carefull not to get your fingers wedged between the cylinder head and the block. The old head gasket will probably stick to either the head or the block (in this case it came out with the head) |
|
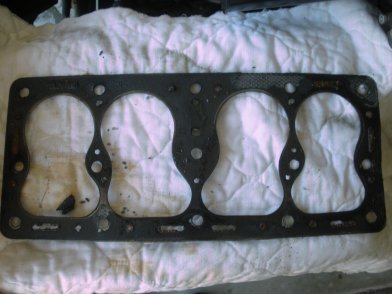
19. If you old head gasket does not tear apart, then take some time and inspect it. See if you can find where the problem was at. |

|
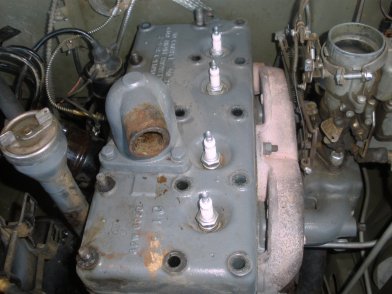
20. Next is the cleaning the old gasket material from the head and engine block. Here you see reminance of the gasket material that needs to be COMPLETELY scrapped off. Use your favorite cleaning solvent to soften and scrap off the gasket material off. |
|
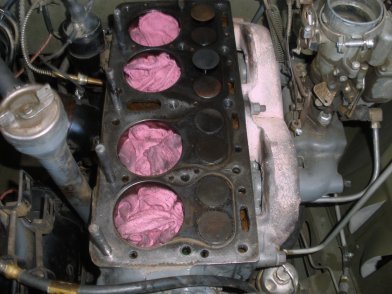
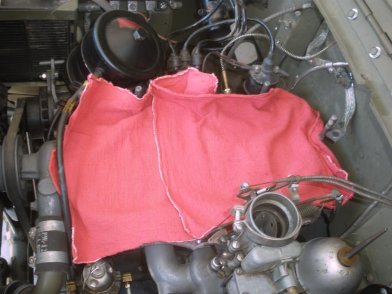
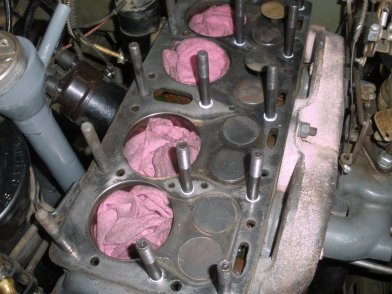
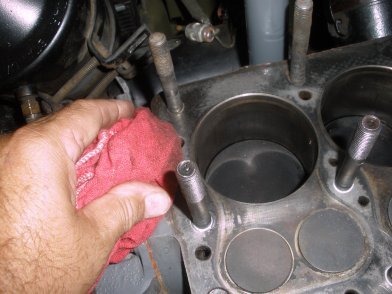
21. On the block, wipe down the surface. Next, small towels in each of the cylinders to keep the debris out from the cleaning. |
|
22. Like the cylinder head, you need to use your favorit cleaning solvent to soften up the reminance of the gasket material and use the hand scrapper and remove it COMPLETELY. Try to keep the debris out of the cylinders. |
|
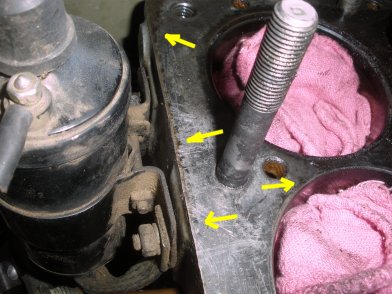
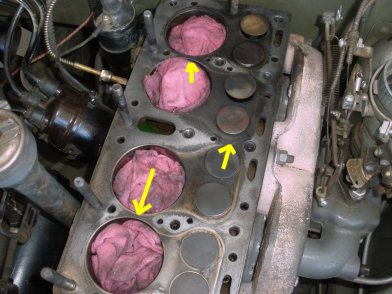
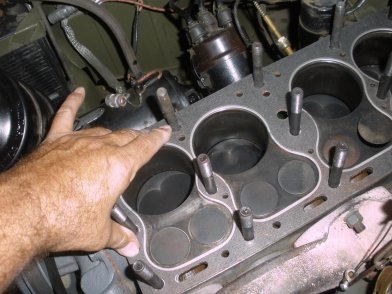
23. Reminance of the gasket material can be very subtle, especially between the cylinders. Inspect your cylinder head and the block multiple times as you want this surface to be completely clean. |
|
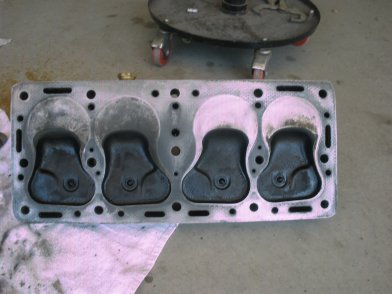
24. CYLINDER HEADS may need to be machined flat! If you don't know when the last time a head gasket has been replaced, you should take the Cylinder head down to a machine shop and have it milled flat. In this example, it is a fairly new NOS head, so it only needed to be cleaned. |
|
25. Block is now cleaned and covered while other tasks are being done. You want to keep this area clean from dust if possible. |
|
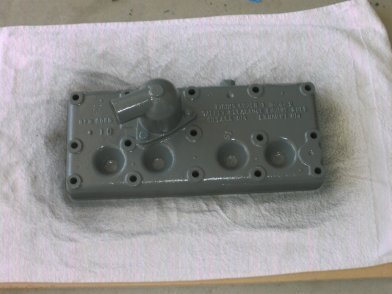
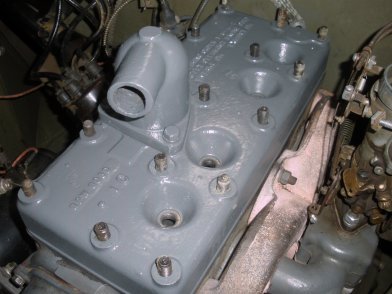
26. *optional* Now that the cylinder head is cleaned, its time for a fresh coat of paint. After cleaned the outside of the head, and plugging the spark plug holes and temperture element inlet, it was painted. |

|
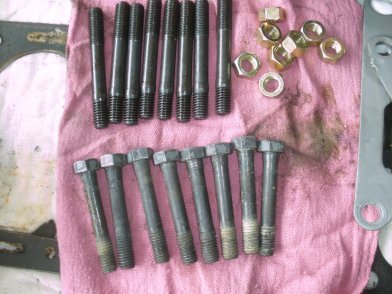
27. If you take a look at your bolts or studs that were removed, you will notice that a sealant is present. This needs to be cleaned off the bolts or studs, as well as out of the block. |

|
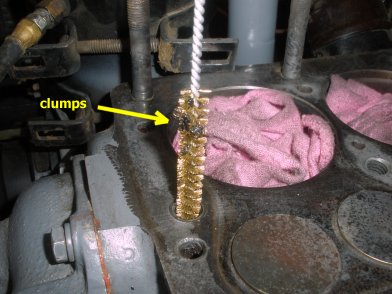
28. To clean out the threads in the block, pull out your brake cleaner and brass wire brush. Soak the brass wire brush with the brake cleaner. |
|
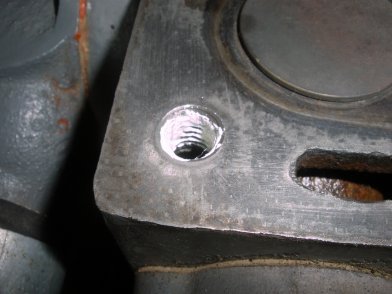
29. With the brass wire brush soaked with brake fluid, clean out the stud threads in the block. You will see clumps of sealant come up out of the block. Repeat these steps for all the threads until each one is clean of sealant. |
|
30. *optional* In this case, the F head bolts are replaced with studs. Studs replaced the bolts on engines towards the later part of the war. Many restorers prefer the studs versus the bolts. |
|
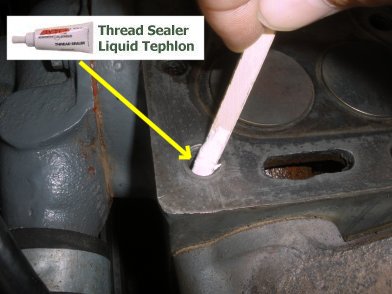
31. Assuming that the head is ready to be put back on (i.e. paint dry, and surface cleaned) you need to prepare the threads in the block. Here we use a small coffee stirrer stick and place some thread sealer on in the threads. |
|
32. By applying a small amount of thread sealer to both the stud and the threaded hole(s) it will essentially create an O-ring around the bottom and top of the stud. Should help prevent seepage. |
|
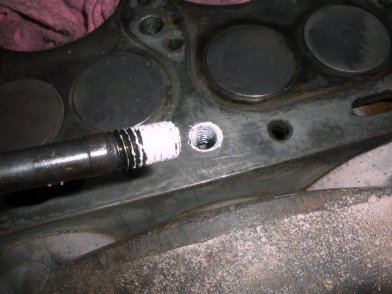
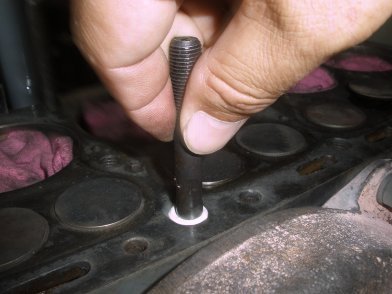
33. Applying a light coat the 2/3rds of the stud and inserting the stud into the block the sealer will move up the treads. You should HAND TIGHTEN studs all the way into the block. It will get tighter as you continue to rotate the stud and the sealer is being pushed to the top. |
|
34. After you have tightened all the way, you should have a little excess at the top of the stud. This will need to be removed. Repeat the process for the remaining studs. |
|
35. When you are all done, you should all the studs are in place, and excess sealer is removed. |
|
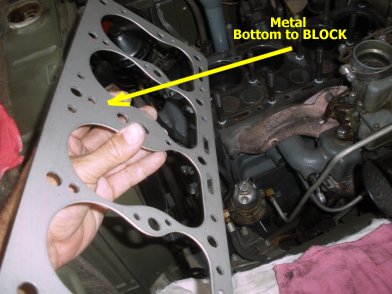
36. Now its time to prep the head gasket. In the Felpro engine kits the head gasket has a fiber side and a metal side. The metal side goes to the block side. This is the side we want to prep with some copper sealer. |
|
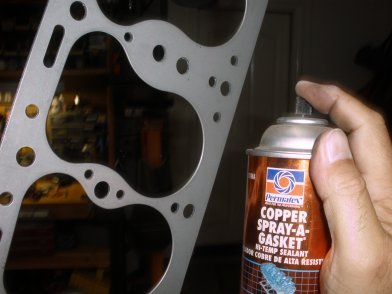
37. After giving the metal surface of the gasket a quick cleaning, we spray the metal side with the copper gasket sealer. NOTE: some people like spraying both sides of the gasket, we prefer to use only spray the metal side. |
|
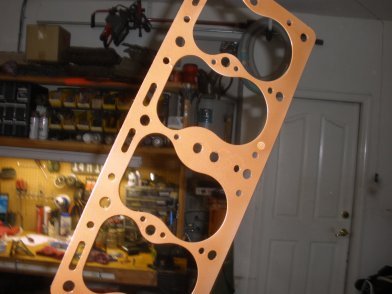
38. You don't want to cake the copper gasket sealer on, just enough to cover the metal surface. Give this about 5-10min to get "tacky" then it will be ready to drop on the block. |
|
39. While the gasket copper sealer is setting, prep the block one last time by wiping down the surface with a towel and some brake cleaner on it. Now the Head Gasket is ready to be applied. |
|
40. Now that the copper sealer is tacky it is ready to place on the block. Grab the gasket on the sides of the gasket as it will be sticky, and place around the studs. It can take a little time to get it around all the studs, becareful not to tear the gasket. Once you get the gasket around the studs, then press it to the block surface all the way around. |
|
41. With the gasket down, install the cylinder head onto the block. Having an extra set of hands is really helpful as the cylinder head is heavy. Be patient as aligning the 15 studs can be a little time consuming, but it should drop on once you get all the studs aligned. Like before, becareful not to get your fingers smashed by the weight of the cylinder head. |
|
42. Now, to keep the cylinders clean of debris...we place the old spark plugs back in. We will take out and replace with new spark plugs later. |
|
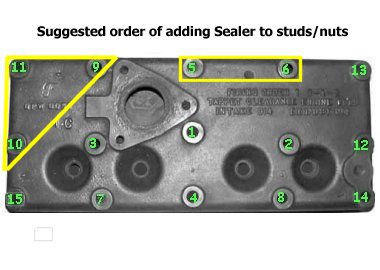
43. Here is a suggested order of placing the nuts on the head. Since we are applying a sticky sealer you need to take into account the brackets that are installed on the head. The Sealer will act as an O-ring between the nut/stud and cylinder head. THIS IS NOT THE TORQUE ORDER. |
|
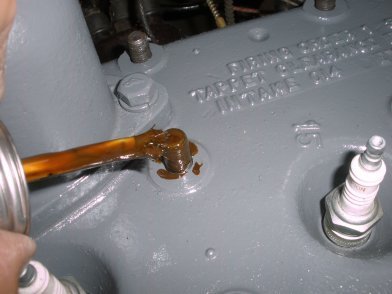
44. We apply the Permatex 3H sealer around each stud and nut, then hand tighten in the order we mentioned in the last item. This stuff is sticky so have a solvent rag handy to wipe your hands off, and to wipe up excess. |
|
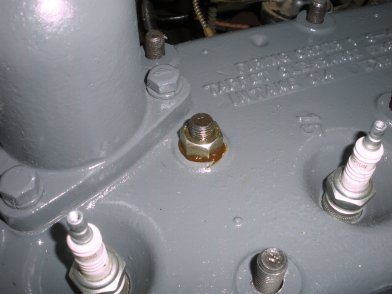
45. Once you get the nut on, wipe the excess off and go to the next one. This process can get very sticky so keep you may want to use some gloves and replace them as when they get to sticky. |
|
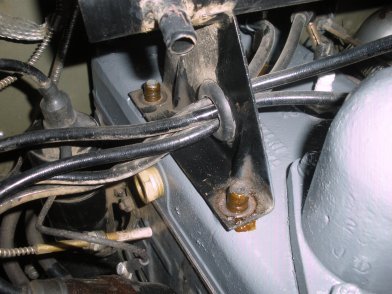
46. Here you see the Air tube being applied and the two nuts going on the studs one after another. Apply the sealer under the bracket first then lay the air tub on top and apply the nuts. |
|
47. Following the diagram above, you see the oil filter bracket being applied wth all three studs having sealer applied first. |
|
48. Now that all of the nuts have sealer and are on the studs, give them one last wipe down with a rag and solvent to clean them up before we torque them. |
|
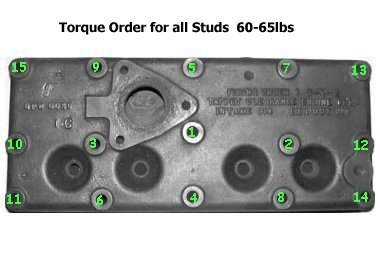
49. Now we are ready to torque down the nuts on the studs. It is important to follow this order so the cylinder head is pressed on evenly. For an engine with all studs like this one, the torque is between 60-65lbs |
|
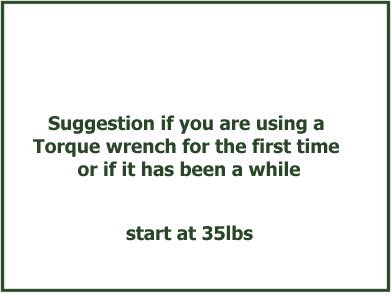
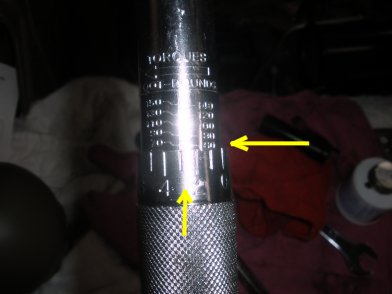
50. *Suggestion* If you have not used a torque wrench before it is worth while to try it and get used to the torque limit. Rather that set the torque at the 63lbs right off the bat, start at 35lbs and torque down all the bolts which allows you to get used to the "Clicks" of the wrench. Go through all the studs. |
|
51. Now we are ready to torque between 60-65lbs, so here we set it at about 63lbs. Many torque wrenches are set differently, so you need to verify the correct setting on the wrench prior to starting. |
|
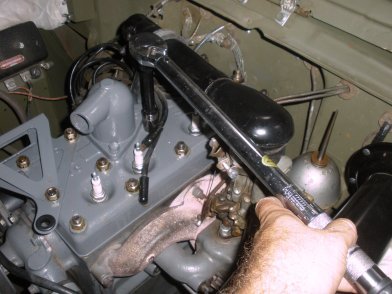
52. Following the torque order above, we start tightening each nut down listenng for the click. Go slow so that you do not break/snap a stud. |
|
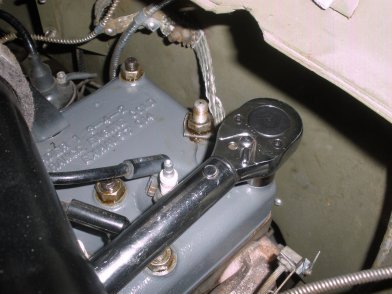
53. Following the diagram above it goes pretty easily, but the back nuts are a little more challenging because your space becomes limited. |
|
54. Ok, now that all the studs/nuts are now torqued down, take your solvent rag and wipe down any excess sealer aroudn the cylinder head. Its now time to start putting pieces back on in order to test. |
|
55. We start with putting the oil filter cannister back on. Run the top oil line through the bracket as shown. |

|
56. Before running the top oil line back into the oil filter, we put on some fresh threading tape and install the oil line and start the three oil filter canister bolts to the bracket. |
|
57. Install the oil filler tube clamp to the last oil filter bracket. This one can be a pain to reach, but with some patience you can get this on. Also, install the rubber air tube to oil filler line. |
|
58. Next, install the air horn on carb clamp and the grommet over the air tube and air horn connect. |
|
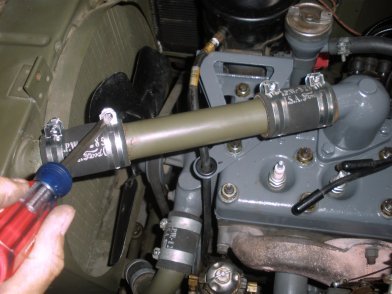
59. Next, we replace the upper radiator tube with fresh new clamps. |
|
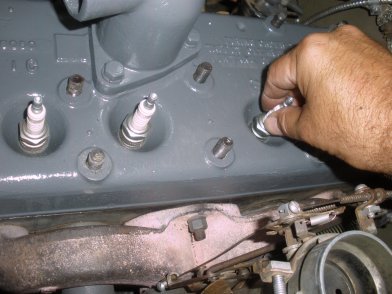
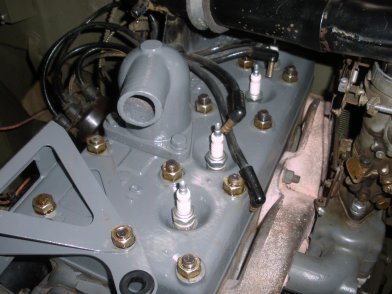
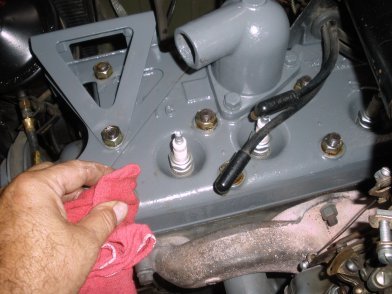
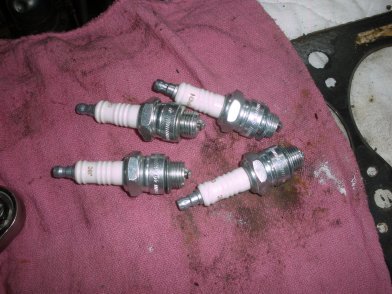
60. Here we have 4 new spark plugs gapped to .30 ready to be installed. So we remove the old ones we had in the cylinder head for protection and replace with these new ones. |
|
61. With the new spark plugs installed, we add the cables back to the spark plugs. |
|
62. Next, we install the temperature gauge element back into the cylinder head and tighten. |
|
63. Next we add the radiator to tub stabilizer. |

|
64. Finally we fill the radiator back up, listening for drips or leaks along the way. |
|
65. OK READY TO GO. Make one last check around the engine, remove any parts, tools, rags around the engine, and fire the engine up. |
|
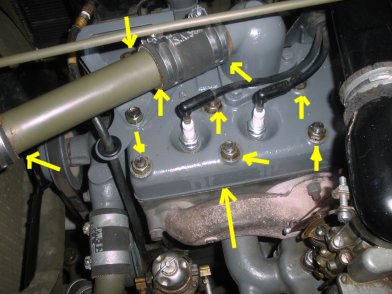
66. While the engine is running you should be looking for leaks. Look at all your studs/nuts, upper radiator hose connections, look on the ground as well for leaks that are dripping. Let the engine run for about 15-20 minutes. |
|
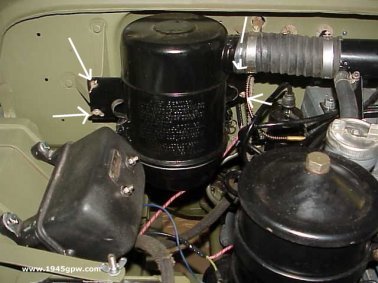
67. If everything is working good then finish by putting the air filter on and your ready to roll |
|
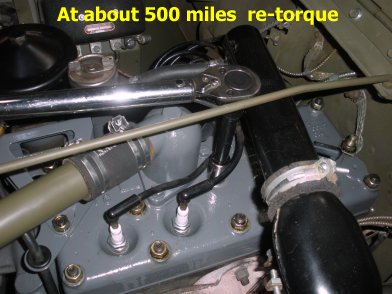
68. REMEMBER! after 500 miles to RE-TORQUE your cylinder head studs/nuts. Hope this helped!! |
