
Replacing your WWII Jeep shock absorbers may be a little more challenging than you would expect. Here are steps to replace your shock absorbers.


|
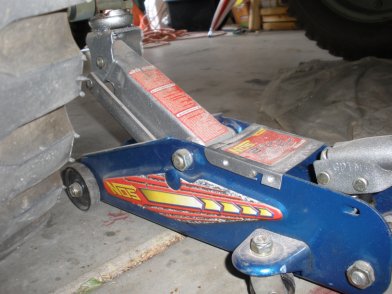
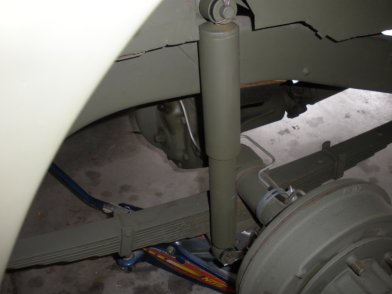
1. While replacing shocks may seem trivial, there can be some challenges geting the rubber bushings compressed in order to get the cotter pins on. While not necessary, we will take the wheel off in order to show you good pictures. First, we jack the rear driver wheel up. |
|
2. Next, remove the lug nuts and pull the wheel off. |
|
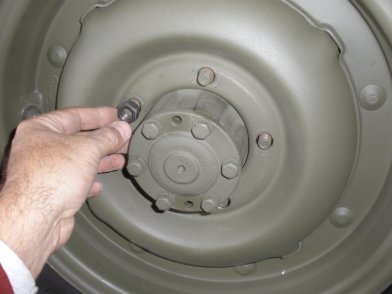
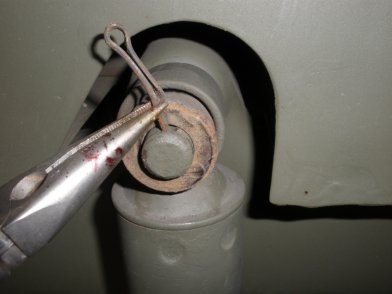
3. Straighten the cotter pin out on both the upper and lower areas and pull the cotter pin out. |
|
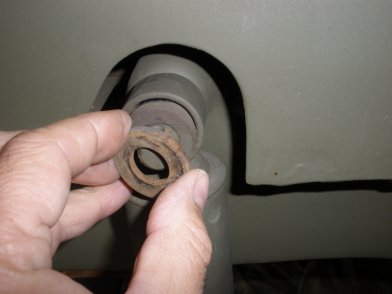
4. Now pull the washer off of the upper and lower pins. |
|
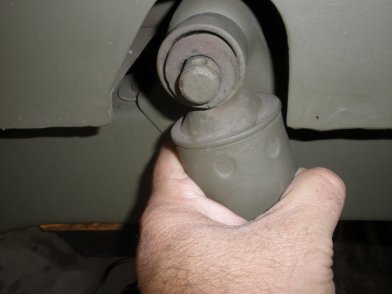
5. Next, wiggle the shock back and forth and the on the upper pin, and the shock will start to remove. Continue the same wiggle for the lower pin and the shock will pull off. |
|
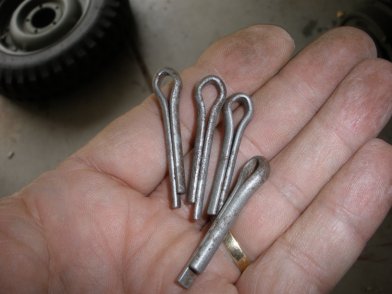
6. Next prepare your cotter pins 52946 for the replacement. Shown here are some NOS cotter pins. |
|
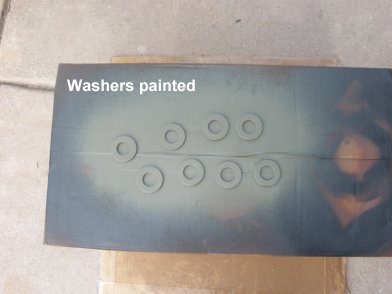
7. Before installing your shock absorbers Front Monroe A6902 Rear Monroe A6903 (longer) and washers A227 , be sure you prep by painting all of your parts as the color most likely will not match your current vehicle. |
|
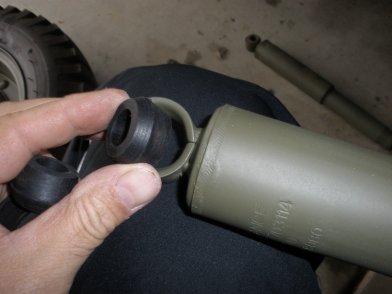
8. Next, prepare the shocks by placing the rubber grommets in both the upper and lower portion of the shock. |
|
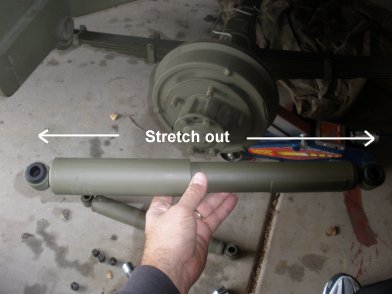
9. Next, pull the upper and lower legs of the shock and stretch them out. It is easier to compress the shock when adding to the frame than the latter. |
|
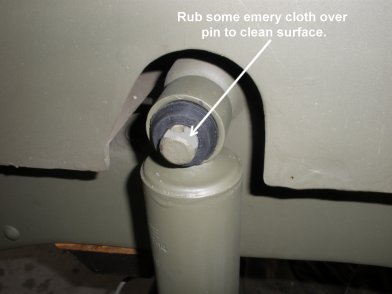
10. Use some emery cloth on the pins prior to pushing the shock/grommets on. Now, push both upper and lower legs of the shock on to the pins and push the grommets back to the fram as close as you can. |
|
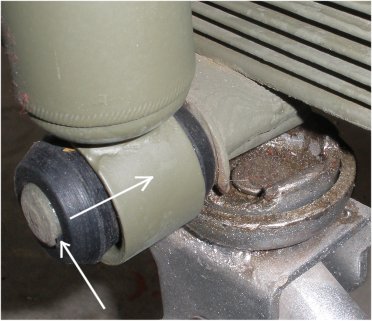
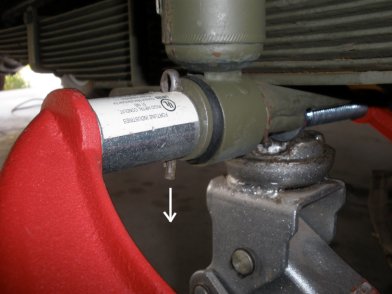
11. The previous picture shows us that we have enough room to push the washer and cotter pin on, but if you look at the bottom, we are going to need to compress the grommets in order to get the washer and cotter pin on. There is a specific tool to do this, but most of us don't have it, so we need to improvise. |
|
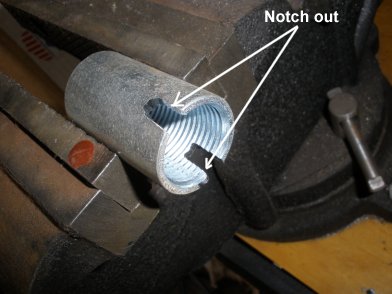
12. We found a little conduit coupling unit that fits over the pin of the bottom shock absorber. Because this piece is a $1 piece, we are going to create a tool to help us compress the grommet. First, we notch out a section with a grinder, enough for the cotter pin to move around. |

|
13. Here you see plenty of room for a cotter pin to move, that way when you press this on, you can drop the cotter pin in. |
|
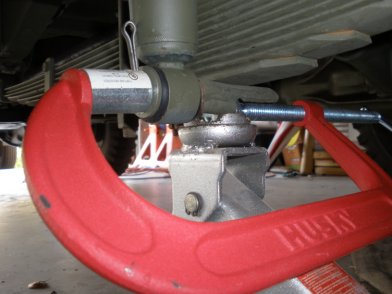
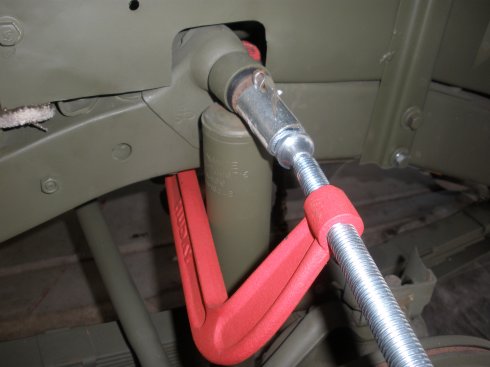
14. Next, we take an 8 inch C clamp and place the washer over the pin, with our modified coupling in place, and start compressing the clamp. Keep the C clamp straight and start compressing. |
|
15. Once compressed enough, push the pin in. Note: you want to push the pin in as far as you can, because as soon as you release the C clamp the pressure on the cotter pin will not allow you to push it in any further. |
|
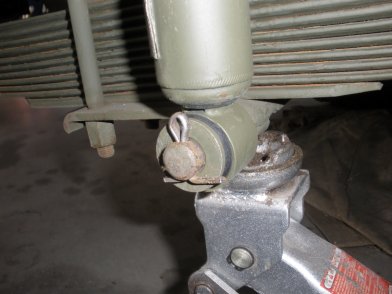
16. Now seperate the cotter pin and the bottom is complete. |
|
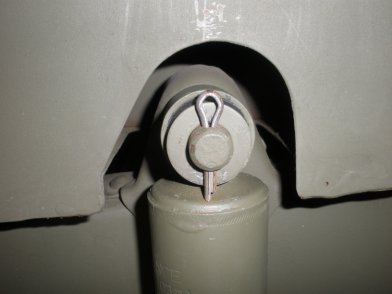
17. The upper section of the shock was a little better. In this case, was able to start the cotter pin, but the bottom of the pin was too tight. |
|
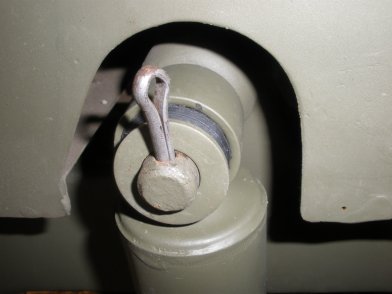
18. By pushing the bottom of the washer in, and tapping the cotter pin with a small hammer, the pin popped through (much easier than the bottom). |

|
19. Next, seperate the cotter pin and replace the tire and release the jack and your done with the first shock! |
|
20. Now, we move over to the other rear shock and run through the same steps. |
|
21. FRONT SHOCKS ?? The front bottom shocks can be applied like above, but what about the pesky top ? In this case, and 8 inch C clamp can work its way around the frame to apply the pressure needed to squeeze the grommets. BE SURE to do the top first on the front as well as back! Hope it helps! |
